Expedition Trailer
Project description
Another one of my hobbies(and passion) is camping, and with time ever so important these days I took it upon myself to build a small expedition trailer to make quick trips much easier!
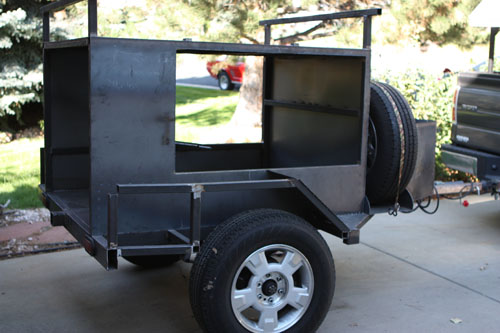
Inspired by some of the off-road expedition trailer builds, this project aims to create a mostly hook-up and go solution to camping. Its a busy world and with smaller vehicles and kids it made sense to move the camping gear to a small trailer. Equipped with water, propane and a kitchen plus a really nice Maggiolina roof top tent it makes camping with younger kids a bit easier or take a longer trip deeper off road!
What I am getting into
Well I guess I had better do a lot of reading, I mean I am good at fabrication but a trailer by myself?!?
After seeing a trailer on the highway and tracing it back to Drew’s really awesome build I started thinking about the idea of doing one myself. I didn’t have much money or time but the idea grew on me and I found myself research many builds finally I had committed but this was just the beginning of a long journey. I wish a I had documented the earlier stages better but I am just a single person trying to get this thing done.
There are a lot of steps involved in creating something like this, considerations such as safety, weight, balancing, how large and what you want out of it will all make a significant impact on the design and therefor the end result. I chose to go with a moderately over built design to help mitigate safety issues, but had implications for later decisions. Looking back I would scale this back some and simplify the build quite a bit.
So where to start
After a bit more research and a couple crucial tool purchases (IE plasma and better welder (Should have gotten a TIG too 🙂
Naturally its best to sit down and research the proposed project out a bit, see if there are others and what hiccups they had to overcome. I started by researching the various builds on the off road forums ( I H8mud and expedition portal). There are several great build that proved very helpful in brainstorming and understanding the process involved.
I choose to do a standard trailer design, but using tube instead of C-channel it was readily available and fit into my decision to use a larger then receiver stock for the main draw arm (tongue would be receiver stock and therefor hitches can be easily adapted to the trailer). I decided to mount the spare tire and propane tanks on the tongue just aft of a slightly oversize tongue box for additional storage. After getting some basic layout of where stuff was positioned (water tank, electrical etc…) I was able to come up with a working design that I transferred over to sketchup (which I have misplaced for now)
So we settled on our basic design, now its time to order some stuff! Since I had figured out my rough weight and built in a safety margin I closed in on what parts I would need for the axel and wheels, the rolling portion, of the trailer. I was lucky and found some stock wheels for sale matching the pull vehicle exactly for a great price and this made it necessary to choose an axle that would match the wheel bolt pattern. I found that ABC trailers was extremely helpful and they custom cut built and shipped an axle setup complete with breaks for a very reasonable price.
Got Parts, and the trouble starts!
Not too much trouble but I start to realize WTH am I going to do when it gets heavier
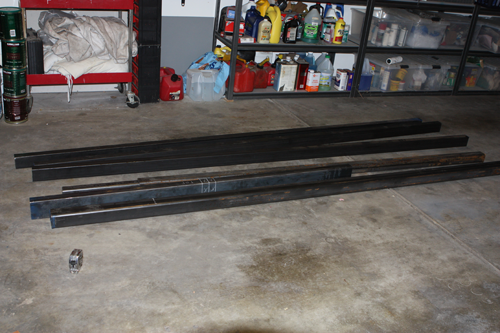
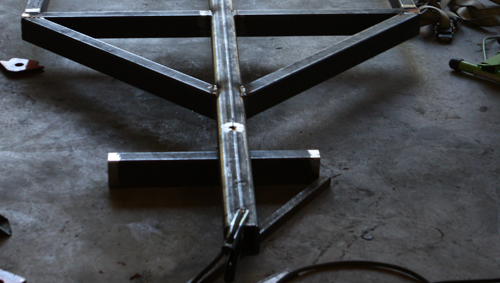
Following the design I had created, I started by laying out some rough cut pieces to get a feel for the scale of the trailer. I wanted to see if the tongue “looked” right, where the axle sat and some of the other features prior to final cut and assembly of these parts. Care must be taken here cause once we start there is no going back.
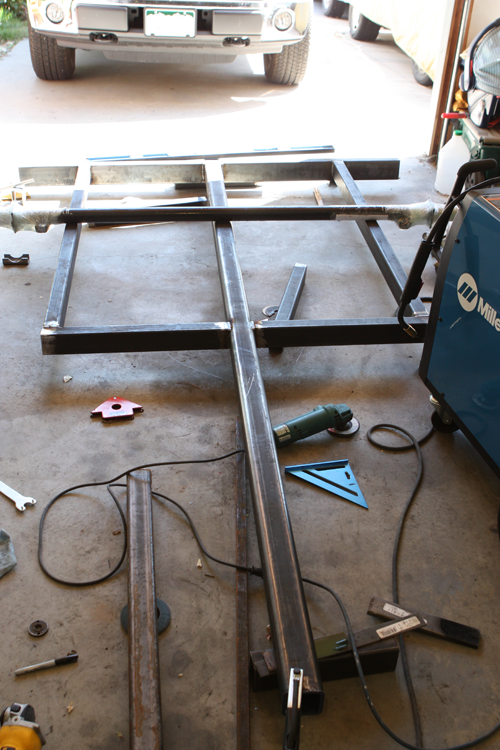
Most of the design looked ok, I adjust the tongue length a bit and move the axle position to help balance when loaded. I decided to start work on the main frame, the design was based around a piece of thick stock tube I had access too that would accept receiver stock. This would make towing from either end possible and construction would be symmetrical around this center line.
Tie in the frame
With all the measurements checking out, remember with this one to check 4 or 5 times!
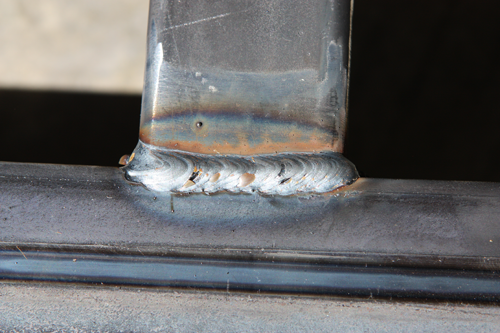
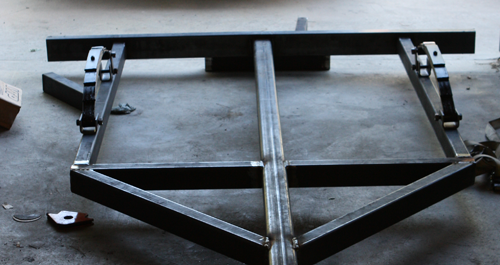
Since our design looked good, everything measured thrice to be sure for squareness and symmetry plus general size and location it was time to start final welding on the joints. I decided that most of them I would grind finish while a few where in difficult places I left. I tried to maintain good welding practices but there are a lot of welds to lay down and not all of them were perfect. Oh well that’s what a grinder is for!
This is a handy trick I needed to use in this build, you can’t always have a nice level welding surface to build on. Sometimes things are large or curved pieces. (I used to work in a fabrication shop and learned a few things that are quite helpful:). Earlier on in layout I affixed a couple reference points known on both the designs and on the actual piece, this gave me a couple fixed points that I can quickly take measurements from to calculate locations, plumb/squareness and a few other things. Its a handy trick that most fabricators know, but can be easily forgotten or overlooked on a large project like this. For reference both points were on center line and were left in place until almost all the frame and box were done.
Springs and Axles
Boys, this thing is getting large and unwieldy I think its time to add some wheels and get it ready to roll around
Everything is looking good so far and within about a 1/16th of where I want it. Really much better then I thought especially cutting by hand with a plasma. I wish I had access to a band saw, I suppose it would have been worth it to pick up a cheap one but the plasma cutter was great in a few spots! Since everything is good and while the frame was still light enough for me to pick up myself I thought it would be a good time to burn in the spring mounts and get the axle mounted.
This part is extremely important if you want the trailer to pull true and well, I used my reference points and a bit of math to calculate a good location (using the standard 70-30 trailer design) and made sure it was square. I left enough room on the frame to include larger spring should the small set be too bouncy, but these will require a redo of this step and would be much more difficult with the trailer mostly complete now.
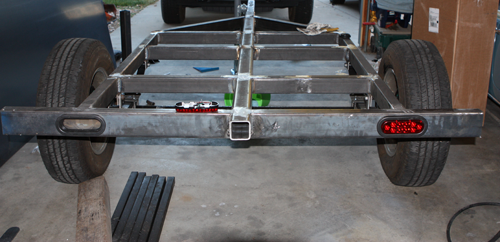
Well look at that it rolls very well and while I ordered a bit wider then I wanted axle it actually turned out just right when compared with the “bumper” piece of steel I had. I decided to finish the day by cutting the tail lights, I will add some (with some reverse lights as well) to the wheel well boxes later. All in all its coming along nicely!